In-game Setup #
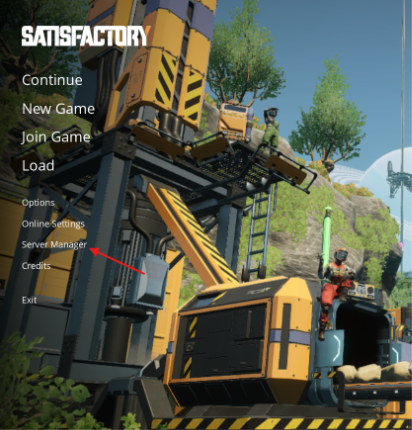
This step is important. Once your server has been installed and setup on the ProRedLine dashboard, you will need to claim your server and finish the setup process in-game. On the home page of Satisfactory, open the “Server Manager”.
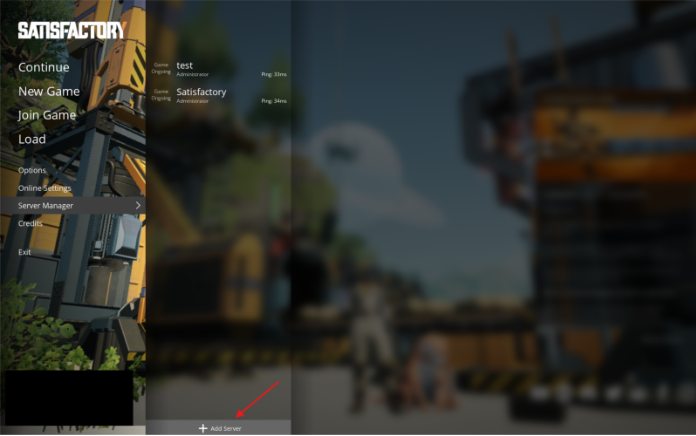
- Press the “Add Server” button on the bottom of the Server Manager tab.
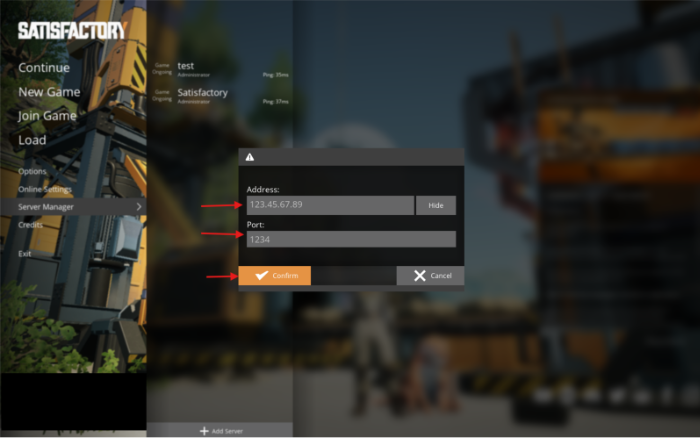
- Now you will be asked for your server’s IP and Port. You can find this on your ProRedLine server dashboard. On your dashboard the server’s address will look like 123.45.67.89:1234. The IP is are the numbers before : (so in this case 123.45.67.89) and the Port are the numbers after : (So in this case 1234). When filled in, click on “Confirm”.
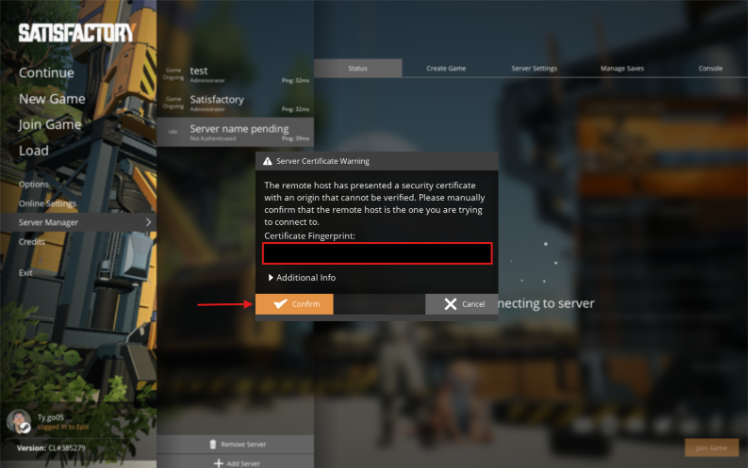
- After clicking “Confirm”, a popup will follow asking if you want to manually confirm the server certificate. Click on “Confirm”.
- Another popup will follow telling you the server is unclaimed and asking to follow a couple of steps. In this popup a friendly server name will be asked. Fill this in with a name you like and click “Confirm”.
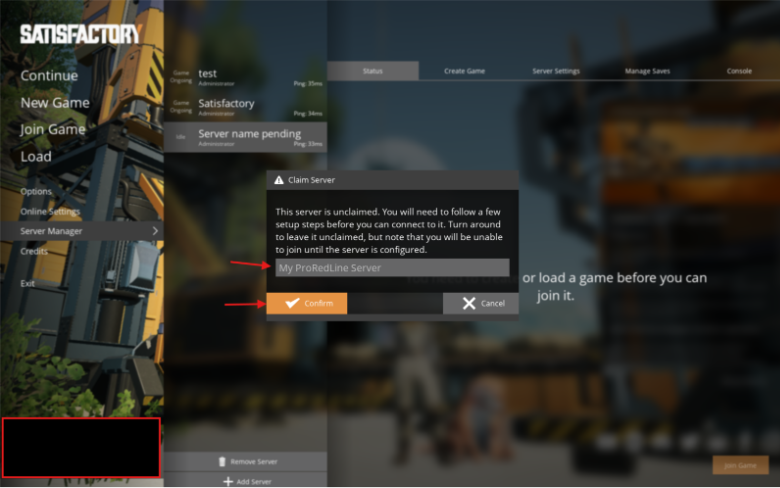
- Now another popup follows asking to set up an Admin Password. This password is used to gain access to your server’s in-game settings in the case you accidentally delete your server from the Server Manager. Make sure it’s a secure password as other users can try gaining access to your server’s in-game settings.
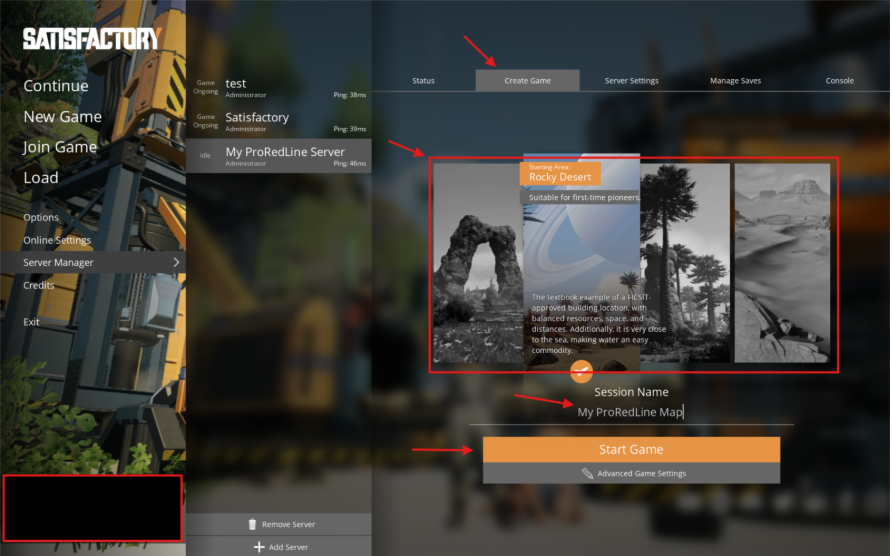
Once you have set up the password, you are automatically an Administrator. Now you will be on a page telling you need to create or load a game before you can join it. You can either create a fresh map or load one of your existing saves.
- Creating fresh map: Head over to the “Create Game” tab. Select the map you would like to play on, enter its session name and click “Start Game”. This will start the installment process on the server. This can take up to 5 minutes. In the meantime, you will see a loading icon on the server’s in-game settings page.
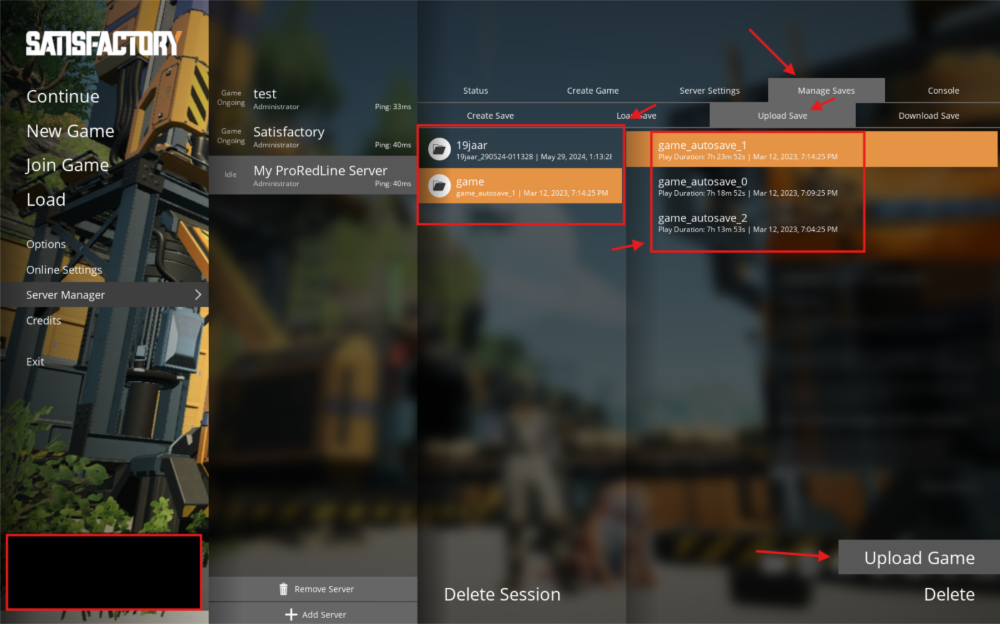
- Using your existing local saves: Head over to the “Manage Saves” tab. Within this tab, select the “Upload Save” tab. Select one of your existing saves and click on “Upload Game”.
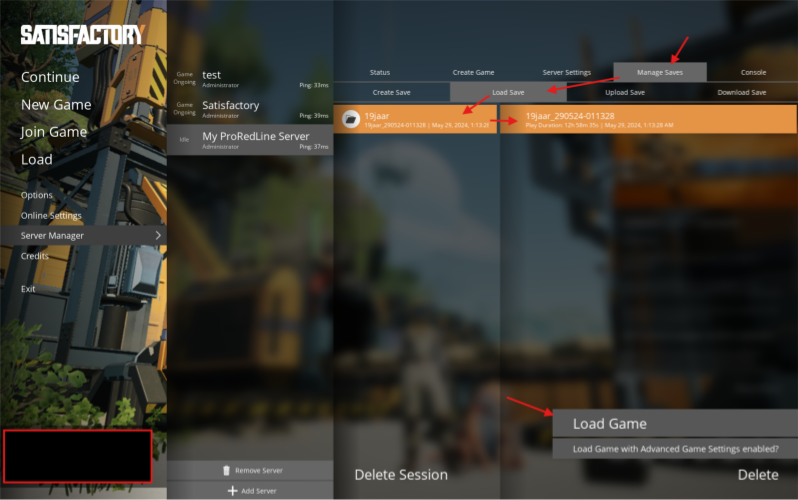
Your existing local save has now been uploaded to the server. Now head over to the “Load Save” tab within the “Manage Saves” tab. Locate and select your uploaded save and click on “Load Game”. Now the server will start loading your save into an active session on the server. This process can take up to 5 minutes. In the meantime, you will see a loading icon on the server’s in-game settings page.
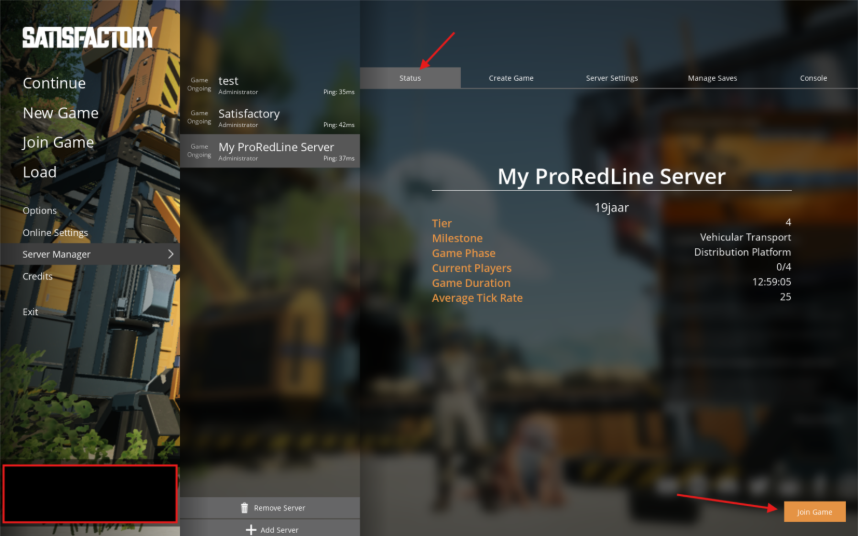
After setup #
Once your new or existing map finishes installing, the loading icon will disappear, and you will regain access to your in-game settings page. Head over to the “Status” tab and click on “Join Game” to start playing!
Still need help after reading this article?