Discord Developer Portal #
To host a Discord bot, two steps need to be completed. The first step has already been done by setting up your bot on the ProRedLine customer dashboard. Now, we need to add the actual bot to your account and eventually link it to a Discord server. Please follow these steps carefully:
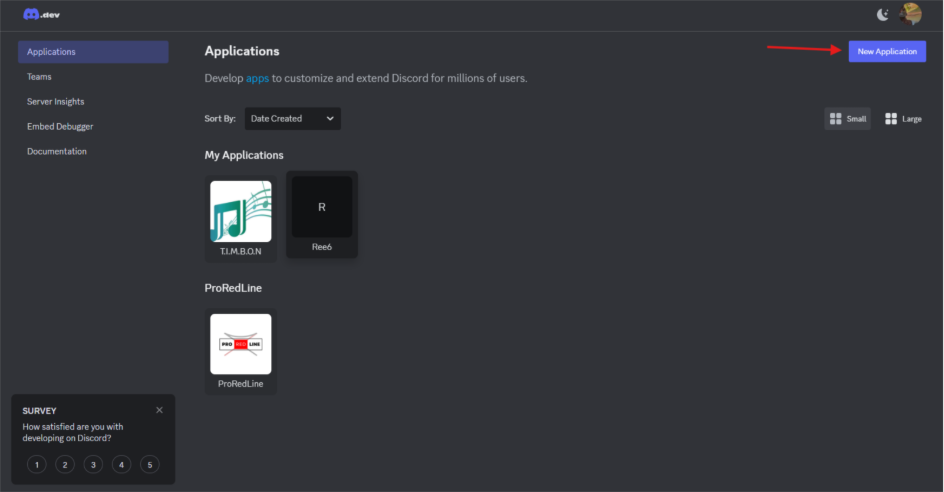
- Go to https://discord.com/developers/applications and sign in with your Discord account.
- After signing in, click the “New Application” button.
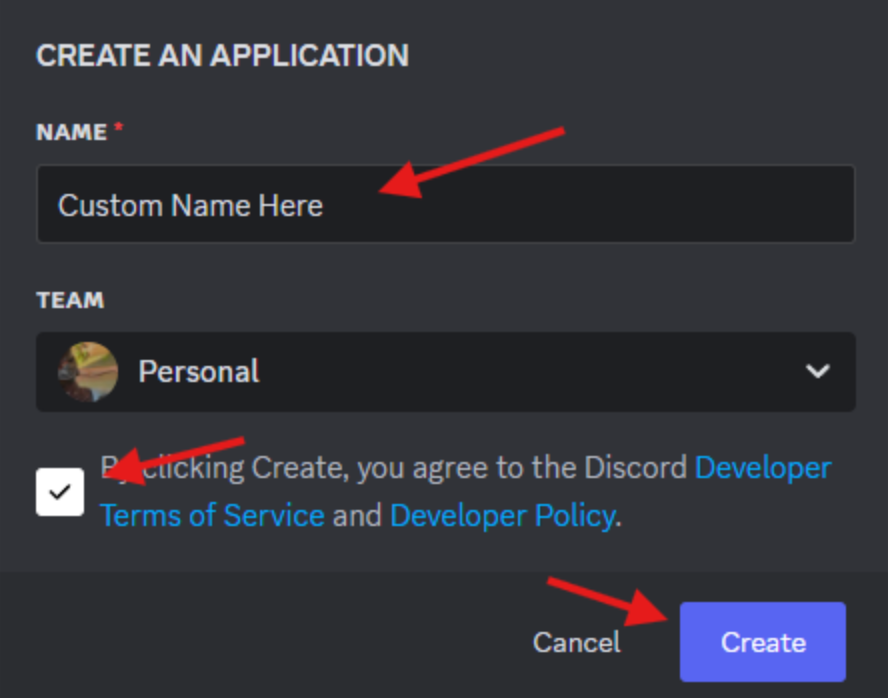
- A pop-up will appear asking for a name for your “application.” This name can be anything you like and is not the name of your Discord bot. After entering the name, click on “Create.”
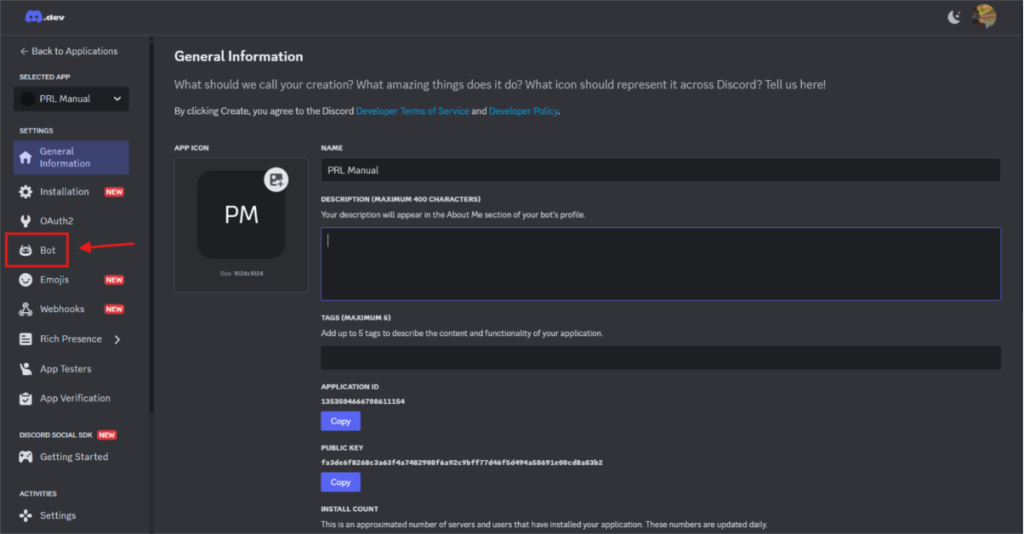
- Your application has been created. Now, we need to add the actual Discord bot. Navigate to the “Bot” tab on the page that opens after creating the application.
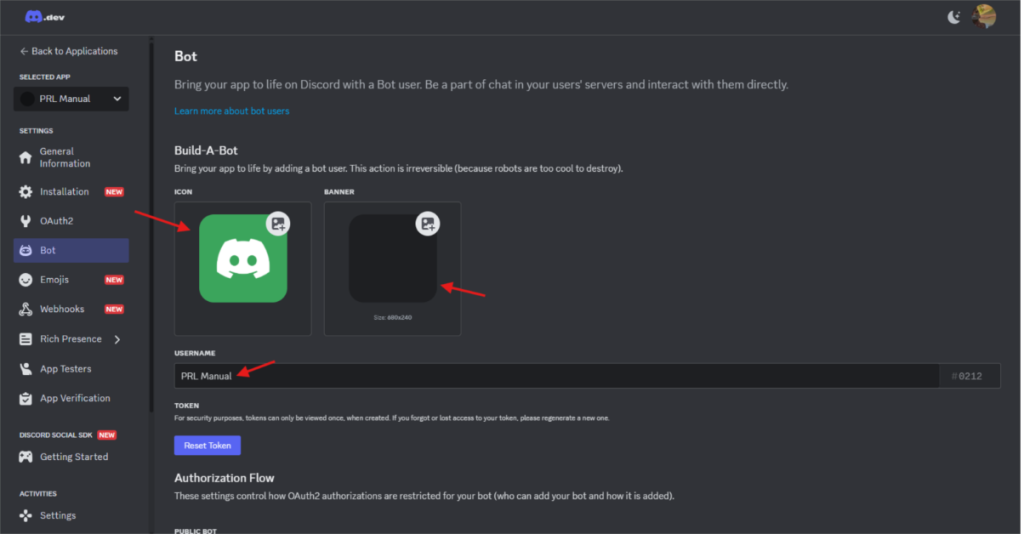
- You can now customize the bot’s icon, banner, and username according to your preferences.
- Now, we need to enable Privileged Gateway Intents. Without these enabled, your bot won’t function properly. On the same page as step 5, scroll down to Privileged Gateway Intents and enable the following options:
— PRESENCE INTENT
— SERVER MEMBERS INTENT
— MESSAGE CONTENT INTENT.

Obtain Bot Token #
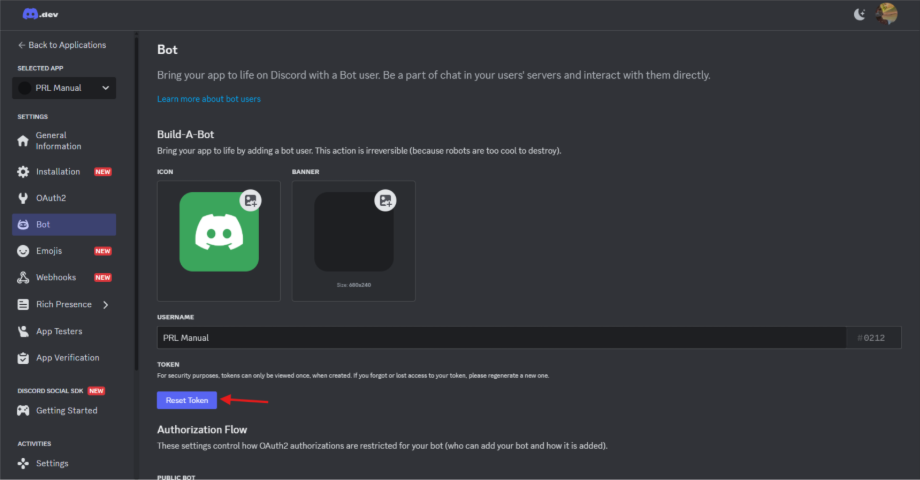
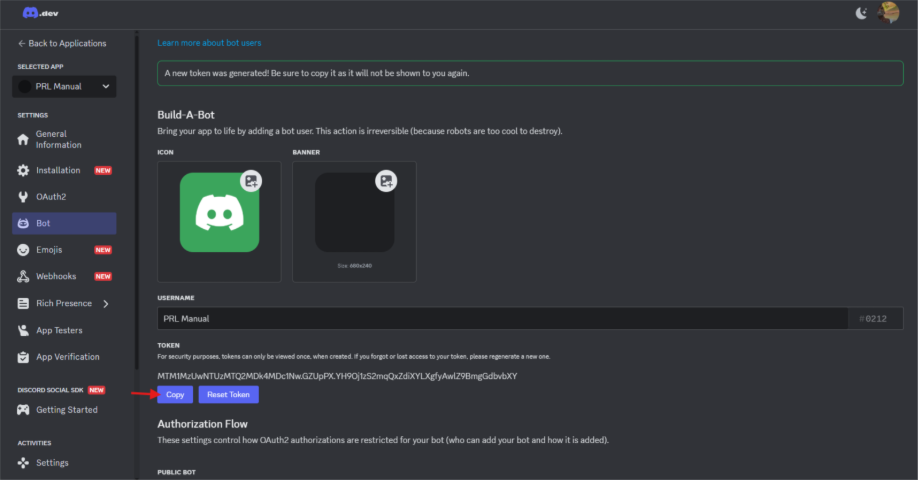
- The final step is to obtain your bot token. This token is used by your ProRedLine-hosted Discord bot to connect with your actual Discord bot. Scroll back up to the “TOKEN” section on the same page as step 6. Click “Reset Token”, and a new token will appear. This token can only be viewed once, so make sure to copy it immediately and store it in a secure location.
- Now, return to your ProRedLine Discord Bot’s dashboard and navigate to the “STARTUP” tab. Paste your copied bot token into the “BOT TOKEN” field.
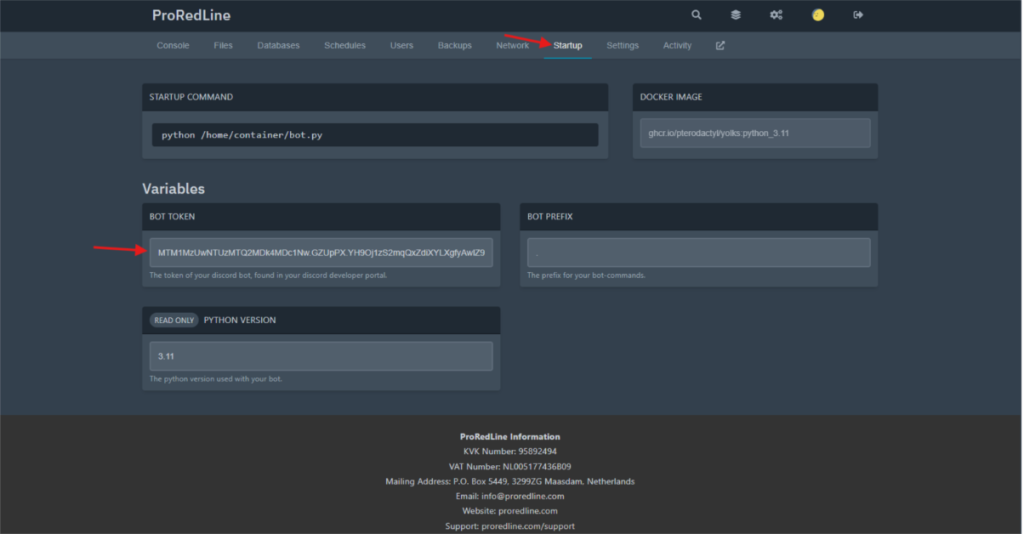
Congratulations! Your ProRedLine-hosted bot is now successfully connected with your Discord Application Bot.
Still need help after reading this article?